Sublime Text
The Sublime Text is a cross-platform text and source code editor, with a Python application programming interface (API). Sublime Text is proprietary software. Its functionality is extendable with plugins. Most of the extending packages have free-software licenses and are community-built and maintained. Sublime Text lacks graphical setting dialogues and is entirely configured by editing text files.
Refer to the Sublime Text Documentation page for more detailed information.
Contents
Deviot Plugin
We are glad to inform you about an awesome Sublime Text plugin for IoT development named Deviot. It is based on PIO Core (CLI) and will automatically install it for you. Please visit official Deviot page for the further installation steps and documentation.
Integration
Project Generator
Integration process consists of these steps:
Open system Terminal and install PIO Core (CLI)
Create new folder for your project and change directory (
cd) to itGenerate a project using PIO Core Project Generator (
pio project init --ide)Import project in IDE.
Choose board ID using pio boards or Embedded Boards Explorer
command and generate project via pio project init --ide command:
pio project init --ide sublimetext --board <ID>

# For example, generate project for Arduino UNO
pio project init --ide sublimetext --board uno
Then:
Import project via
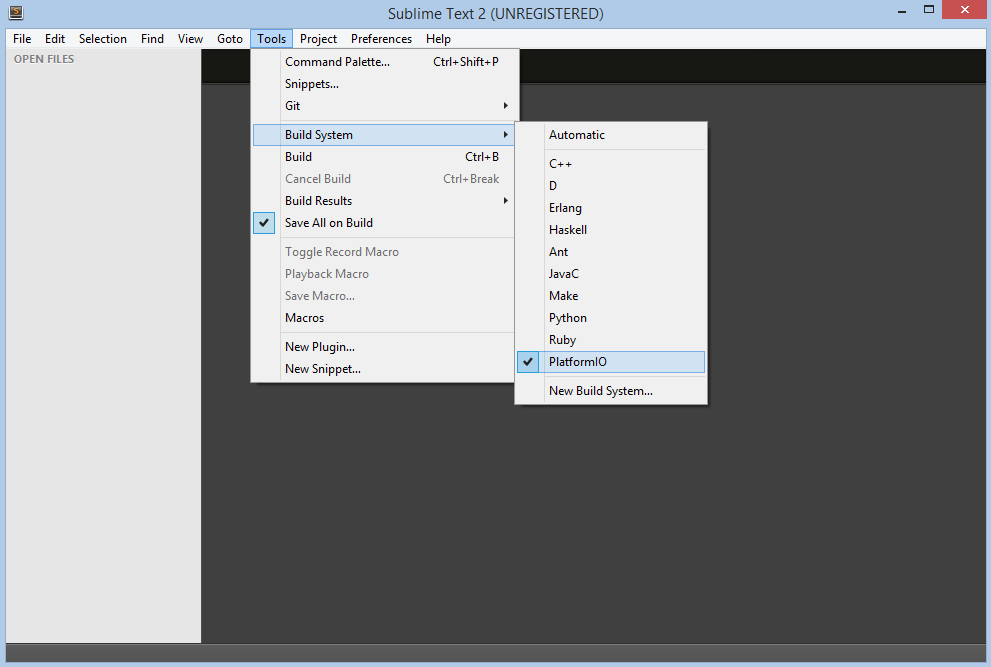
Menu: Project > Open Project...and selectplatformio.sublime-projectfrom the folder where is located “platformio.ini” (Project Configuration File)Select PIO as build system:
Menu: Tools > Build System > PIOOpen source file from
srcdirectory (*.c, *.cpp, *.ino, etc.)Build project:
Menu: Tools > Build.
Also, you can access to all pre-configured targets via
Menu: Tools > Builds With... (ST3)
PIO - Build- Build project without auto-uploadingPIO - Clean- Clean compiled objects.PIO - Test- Unit TestingPIO - Upload- Build and upload (if no errors)PIO - Upload using Programmersee Upload using ProgrammerPIO - Upload SPIFFS imagesee Using FilesystemPIO - Update platforms and libraries- Update installed platforms and libraries via pio update.
Manual Integration
Note
Please verify that folder where is located platformio program is added
to PATH (wiki) environment
variable.
Initial configuration
First of all, we need to create “New Build System” with name “PIO”
from Menu: Tools > Build System > New Build System and fill it like
described below:
{
    "cmd": ["platformio", "-f", "-c", "sublimetext", "run"],
    "working_dir": "${project_path:${folder}}",
    "variants":
    [
        {
            "name": "Clean",
            "cmd": ["platformio", "-f", "-c", "sublimetext", "run", "--target", "clean"]
        },
        {
            "name": "Upload",
            "cmd": ["platformio", "-f", "-c", "sublimetext", "run", "--target", "upload"]
        }
    ]
}
Secondly, we need to select “PIO” Build System from a list:
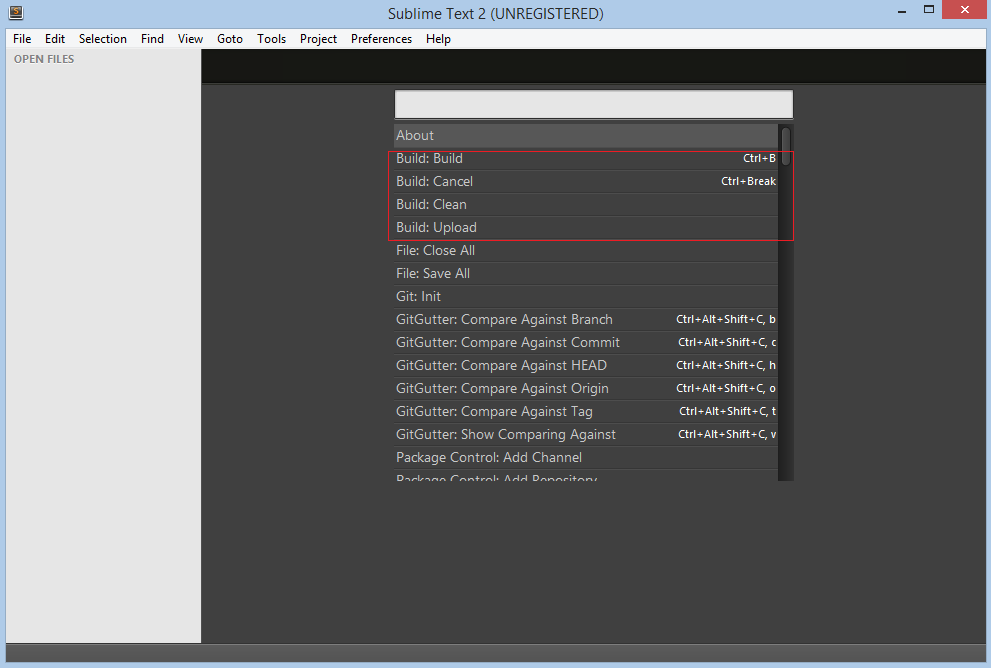
After that, we can use the necessary commands from
Menu: Tools > Command Palette or with Ctrl+Shift+P (Windows/Linux)
Cmd+Shift+P (Mac) shortcut.
Command Hotkeys
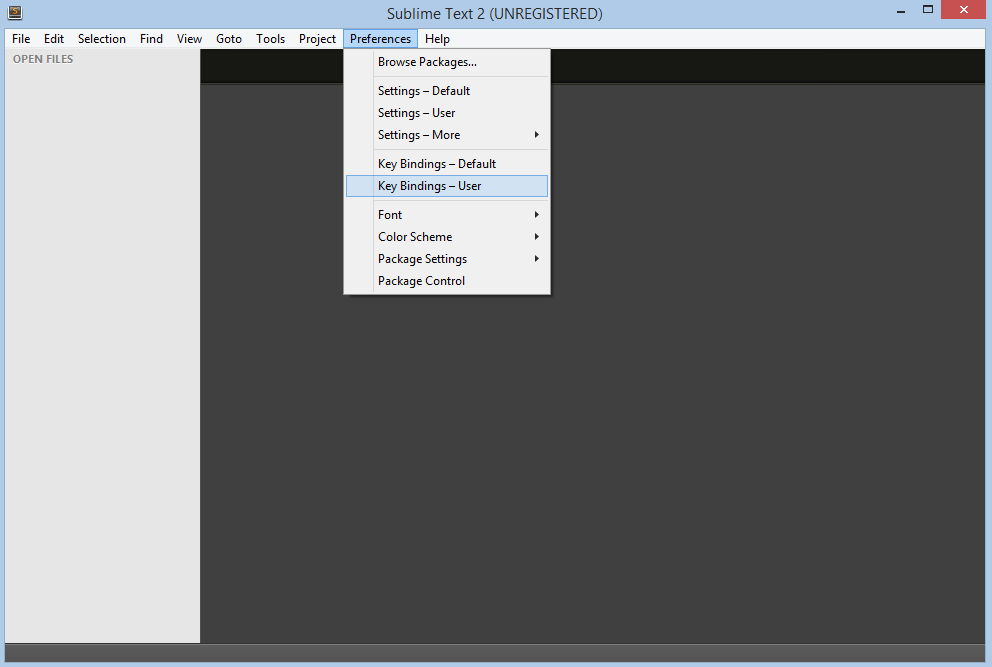
Sublime Text allows one to bind own hotkey per command. Let’s setup them
for PIO commands using shortcut Menu: Preferences > Key-Bindings - User:
We are going to use these shortcuts:
F11for clean projectF12for upload firmware to target device
In this case, the final code will look like:
[
    { "keys": ["f11"], "command": "build", "args": {"variant": "Clean"} },
    { "keys": ["f12"], "command": "build", "args": {"variant": "Upload"} }
]
First program in Sublime Text
Simple “Blink” project will consist from two files:
1. Main “C” source file named main.c must be located in the src directory.
Let’s create new file named main.c using Menu: File > New File or shortcut Ctrl+N (Windows/Linux) Cmd+N (Mac) with the next contents:
#include "Arduino.h"
#define WLED    13  // Most Arduino boards already have an LED attached to pin 13 on the board itself

void setup()
{
  pinMode(WLED, OUTPUT);  // set pin as output
}

void loop()
{
  digitalWrite(WLED, HIGH);  // set the LED on
  delay(1000);               // wait for a second
  digitalWrite(WLED, LOW);   // set the LED off
  delay(1000);               // wait for a second
}
2. Project Configuration File named platformio.ini must be located in the project root directory.
Copy the source code which is described below to it.
; PIO Project Configuration File
;
;   Build options: build flags, source filter, extra scripting
;   Upload options: custom port, speed and extra flags
;   Library options: dependencies, extra library storages
;
; Please visit documentation for the other options and examples
; https://doc.os-q.com/pio/projectconf/index.html

[env:arduino_uno]
platform = atmelavr
framework = arduino
board = uno
Conclusion
Taking everything into account, we can open project directory in Sublime Text using Menu: File > Open Folder and build it with shortcut Ctrl+B (Windows/Linux) or Cmd+B (Mac), clean project with shortcut F11 and upload firmware to target with shortcut F12.
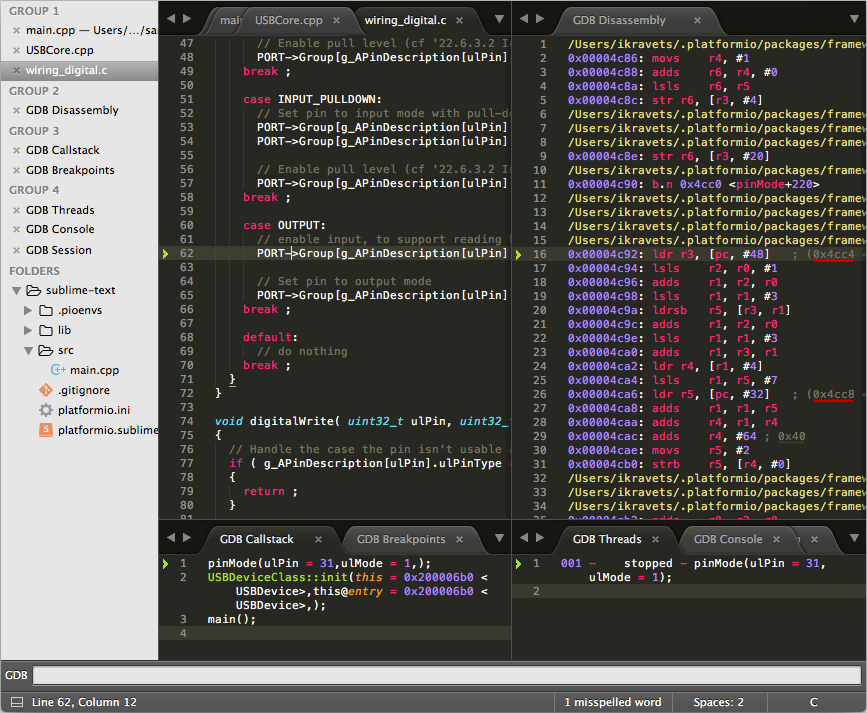
Debugging
A debugging feature is provided by Debugging and new debug configuration named “PIO Debugger” is created. No need to do extra configuration steps!
Install SublimeGDB package
Launch debugger with
F5Wait for a while, PIO will prepare project for debugging and session will be started soon.
